
A Guide for Sketching Layouts
In the stone design industry, no two projects are alike— so why base your design off general square footage? A custom stone surface deserves attention to detail.
At Adamo, we initiate each project with a rough measured sketch of our client's existing surface (or new cabinet plans for new construction clients). It’s with these layouts that our team can clearly define a client's desired design outcome, objectives and project scope.
Here’s a step-by-step guide for sketching layouts and kicking off projects. We’ve used a kitchen in this example but you can apply these same steps to any stone project. For assistance, please email photographs of your space here and we’ll kick start your layout for you.

STEP 1: SKETCH LAYOUT AND MARK SPECIFICS
Sketch the basic shape of your layout (include all related pieces)
Indicate the location of your sink, and specify its type (single, double, undermount, overmount, etc…)
Indicate the location of your stove, and specify its type (cooktop, freestanding or slide-in)
Mark all exposed edges that need to be finished with the symbol (x)
Make sure to draw in your pantry area, refrigerator, stove, sink…etc. In most cases estimators do not need to know the dimensions of these areas but it’s placement is necessary in regards to the layout and seaming.
Note where the walls are in relation to your counter. This will help the estimator determine where you will be having backsplash.

STEP 2: MEASURE
Now that you have completed your sketch, indicate the measurement of each piece in inches. If the client chooses to have their fabricator visit their project and template before fabrication, they need not worry about these initial measurements being 100% accurate. This is merely a tool the estimators use when deciding cost of your project, the size of a slab needed, and the number of slabs needed.
Measuring Length: To measure the length of your existing countertop, measure along the wall from one edge to the opposite edge. Islands are freestanding so you measure each side of the solo shape.
Measuring Width: To measure the width of your existing countertop, measure from the back wall to the finished front edge. Islands are freestanding so you measure each side of the solo shape.

STEP 3: DESIGN DETAILS
Backsplash: If you’d like stone against your walls please indicate which sides require backsplash. Full or 4″ backsplash is common for most kitchens and baths.
Sink Type: Each sink type has its own fabrication process so if you’ve already chosen a new sink, please indicate the type— undermount, overmount, farm sink, vessel..etc.
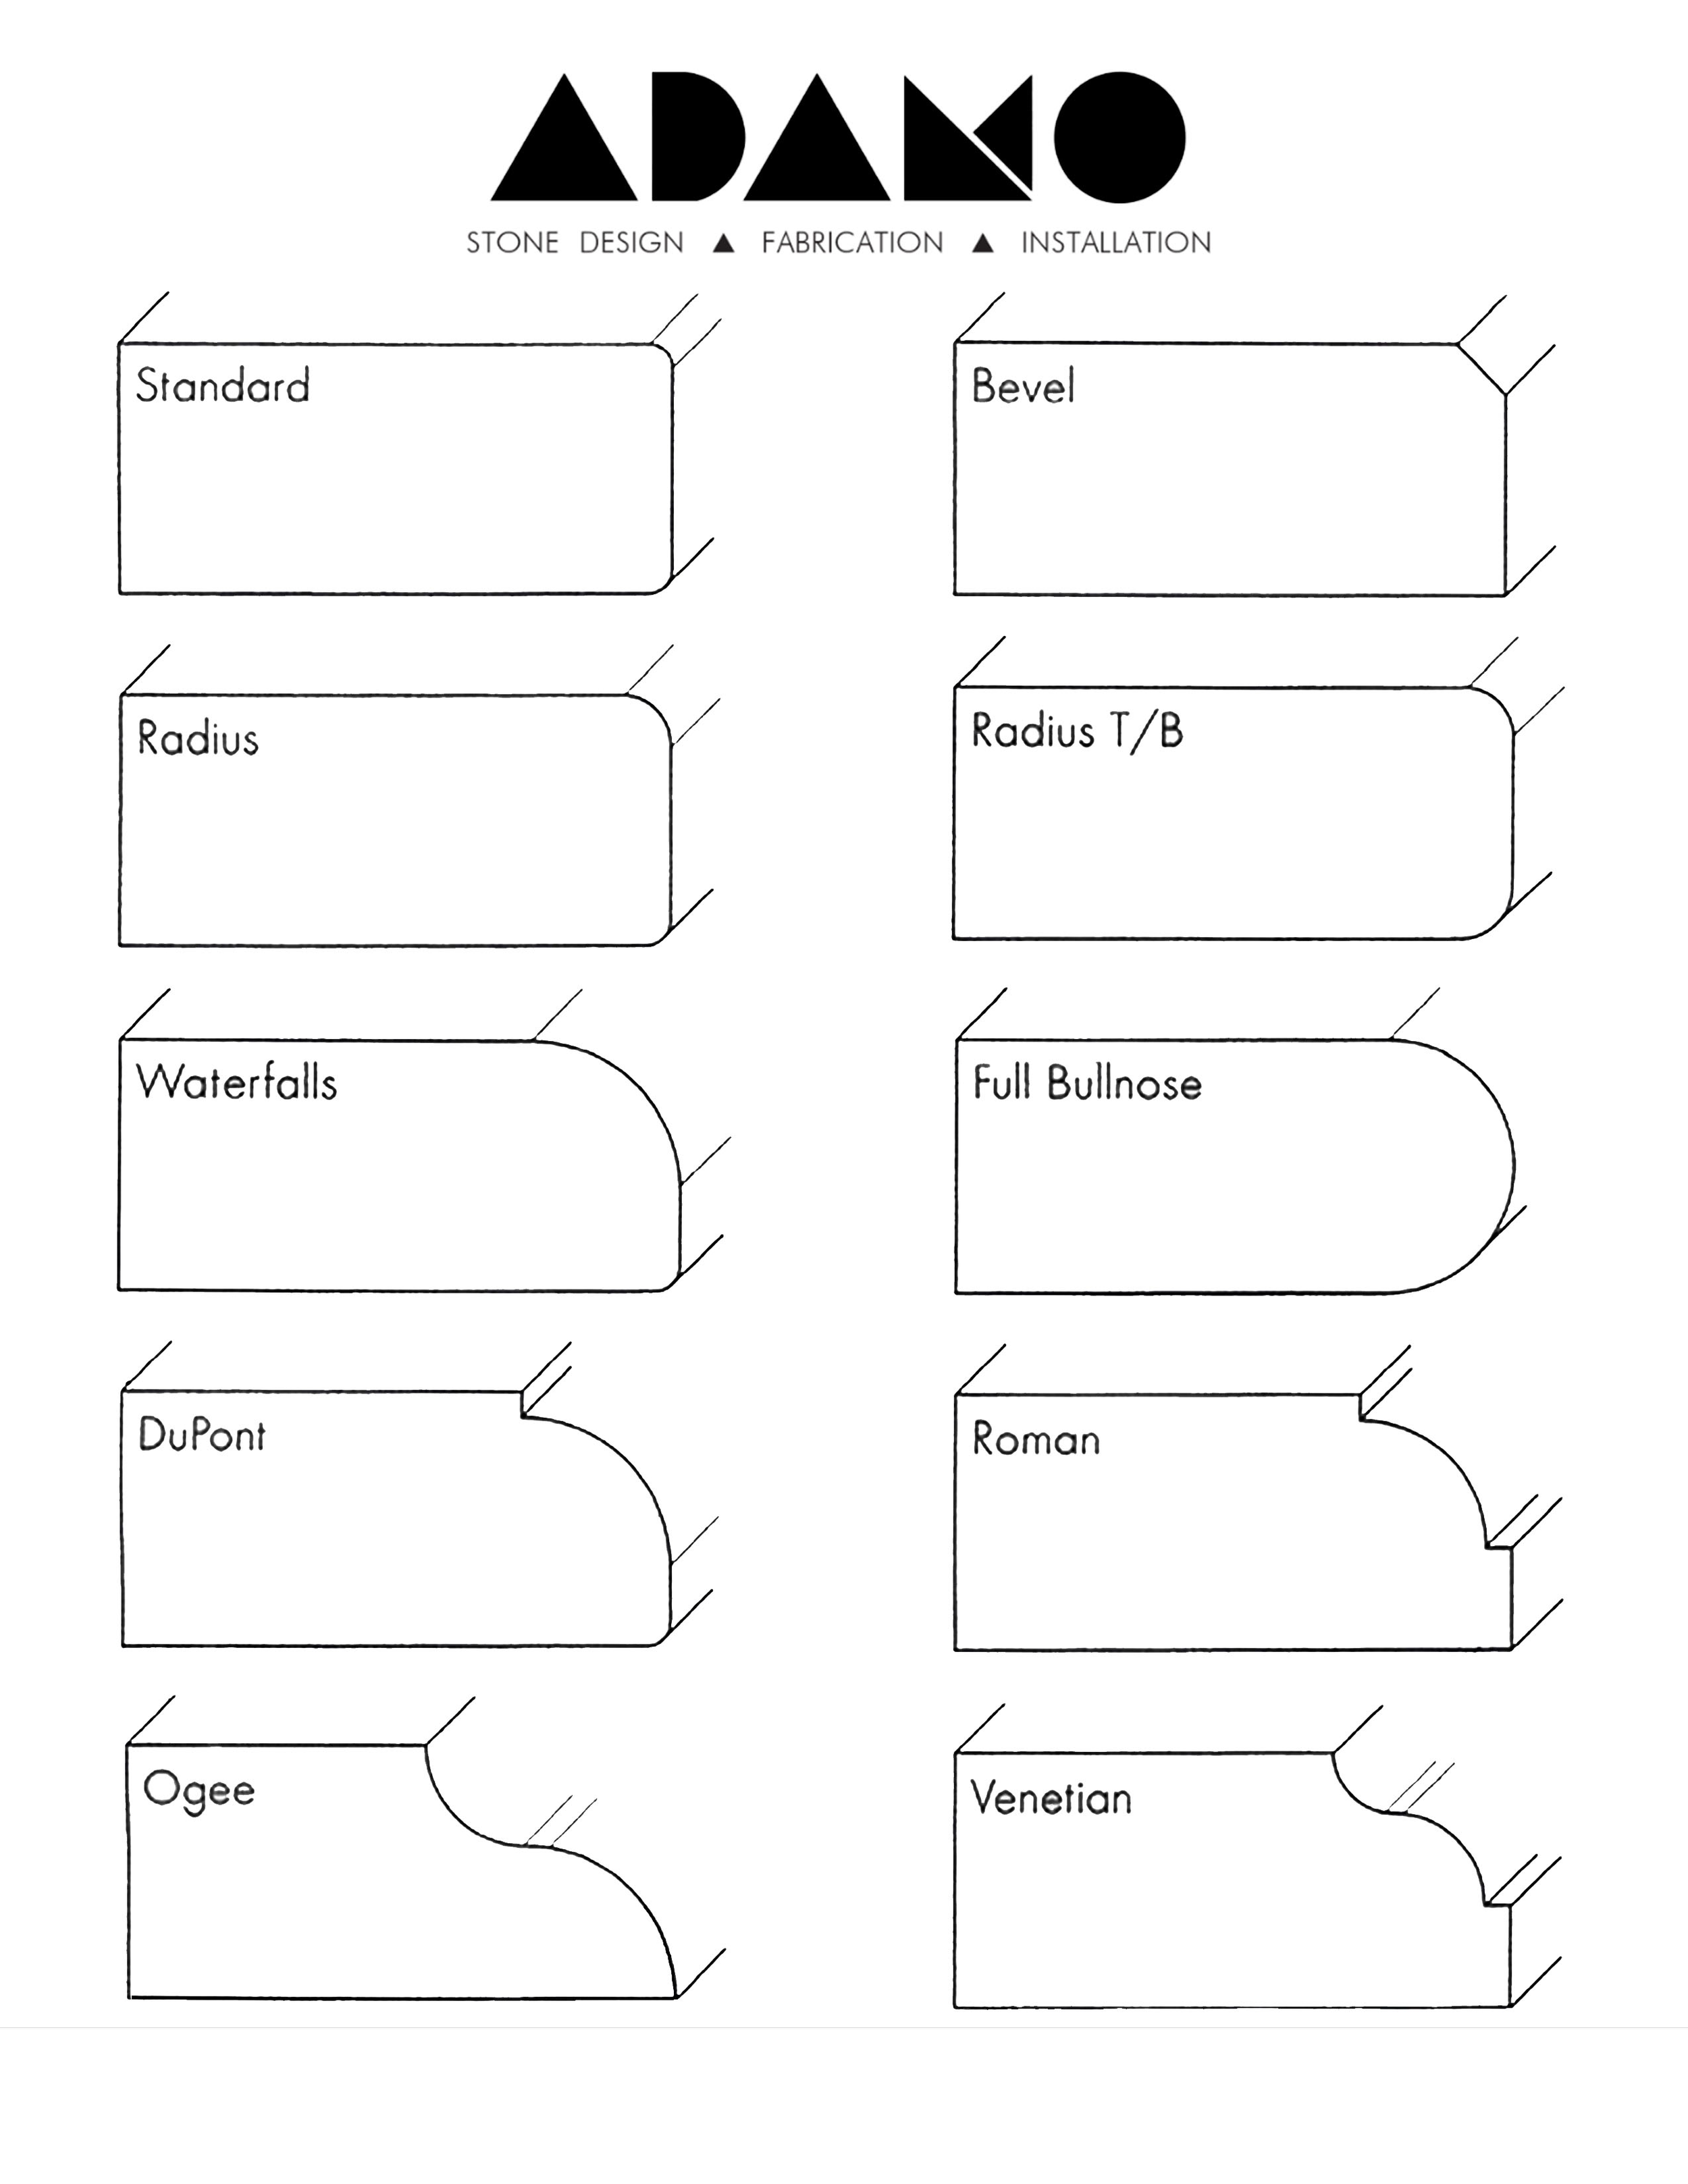
Edging: The areas marked with an X represent where your fabricator will edge. Standard Pencil edge is included at no additional cost in all Adamo estimates. See below for full list of Adamo edge treatments.
For assistance, please email photographs of your space here and we’ll kick start your layout for you.